
Stripe - Tap To Pay
Tap to Pay on iPhone lets users accept in-person contactless payments with compatible iPhone devices. With Tap To Pay, your app can accept payments from Visa, Mastercard, American Express, and Discover contactless cards and NFC-based mobile wallets (Apple Pay, Google Pay, and Samsung Pay). To use Tap To Pay on iOS, your app must use the latest version of the EverCommerce Payments SDK and the proper Stripe Terminal SDK version . Please contact our partner team at [email protected] or directly reach out to your Integrated Partner Manager for information about adding Tap To Pay to your iOS app.
The information provided on this page is limited to support for Tap To Pay on iOS. For information on other SDK methods, delegates, and events please see the ECP - iOS Framework documentation.
Supported iOS DevicesTap To Pay requires iPhone XS or later running a one-year or later iOS version in the United States. We recommend asking your users to update to the latest iOS version for the best performance.
Note: Tap To Pay will not work on Beta releases of iOS
Add Tap To Pay To Your SDK Integration
Setup iOS SDK
Your app must setup the EverCommerce Payments SDK as specified here. However, Tap To Pay will require the latest version of the EverCommerce Payments SDK and the proper Stripe Terminal SDK version (this should be provided with the EverCommerce Payments SDK).
Entitlements and Build File
To use Tap to Pay on iPhone to accept payments, your application must request and configure the Tap to Pay on iPhone entitlement from your Apple Developer account. Instructions for requesting this entitlement can be found here.
After you add an entitlements file to your app build target, add the following:
| Key | Value Type | Value |
|---|---|---|
| com.apple.developer.proximity-reader.payment.acceptance | boolean | true or 1 |
Best Practices For App Design
Follow the Human Interface Guidelines for Tap to Pay on iPhone to ensure of an optimal user experience and successful review process with Apple.
Consider the following:
- Connect to the reader in the background on app startup to reduce wait times when collecting a payment.
- Reconnect to the reader when the app comes to the foreground to reduce wait times.
- Provide merchant education to guide your users on how to accept contactless payments on a compatible iPhone, including in-product promotion and text or email alerts. See Apple’s developer marketing guidance and merchant education for more ideas.
Reconnect to Tap To Pay After Your App Returns From the BackgroundWhen your app moves to the background, the SDK will disconnect from the Tap To Pay device. Your app is responsible for reconnecting when it returns to the foreground. During the call to discover devices an ECPDevice for your Tap To Pay Device will be returned in the callback. This ECPDevice can be saved or copied by your app and used for any subsequent call to connect device. Reusing the ECPDevice will negate the need for another call to discover devices when reconnecting to Tap To Pay and will make the reconnection process slightly faster.
NOTE: Reusing the ECPDevice is not recommended when reconnecting to a Bluetooth device. An ECPDevice returned from a Bluetooth scan can become stale. We recommend calling discover devices as part of your app's process for reconnecting to a Bluetooth device.
Account Linking and Apple Terms and Conditions
Users are presented with Apple’s Tap to Pay on iPhone Terms and Conditions the first time they connect to the reader. To register with Apple, you must specify a valid Apple ID representing your business before accepting the terms presented by Apple. You only need to perform this once per Stripe account. This flow isn’t presented on subsequent connections using the same Stripe account unless otherwise required by Apple, including on other mobile devices.
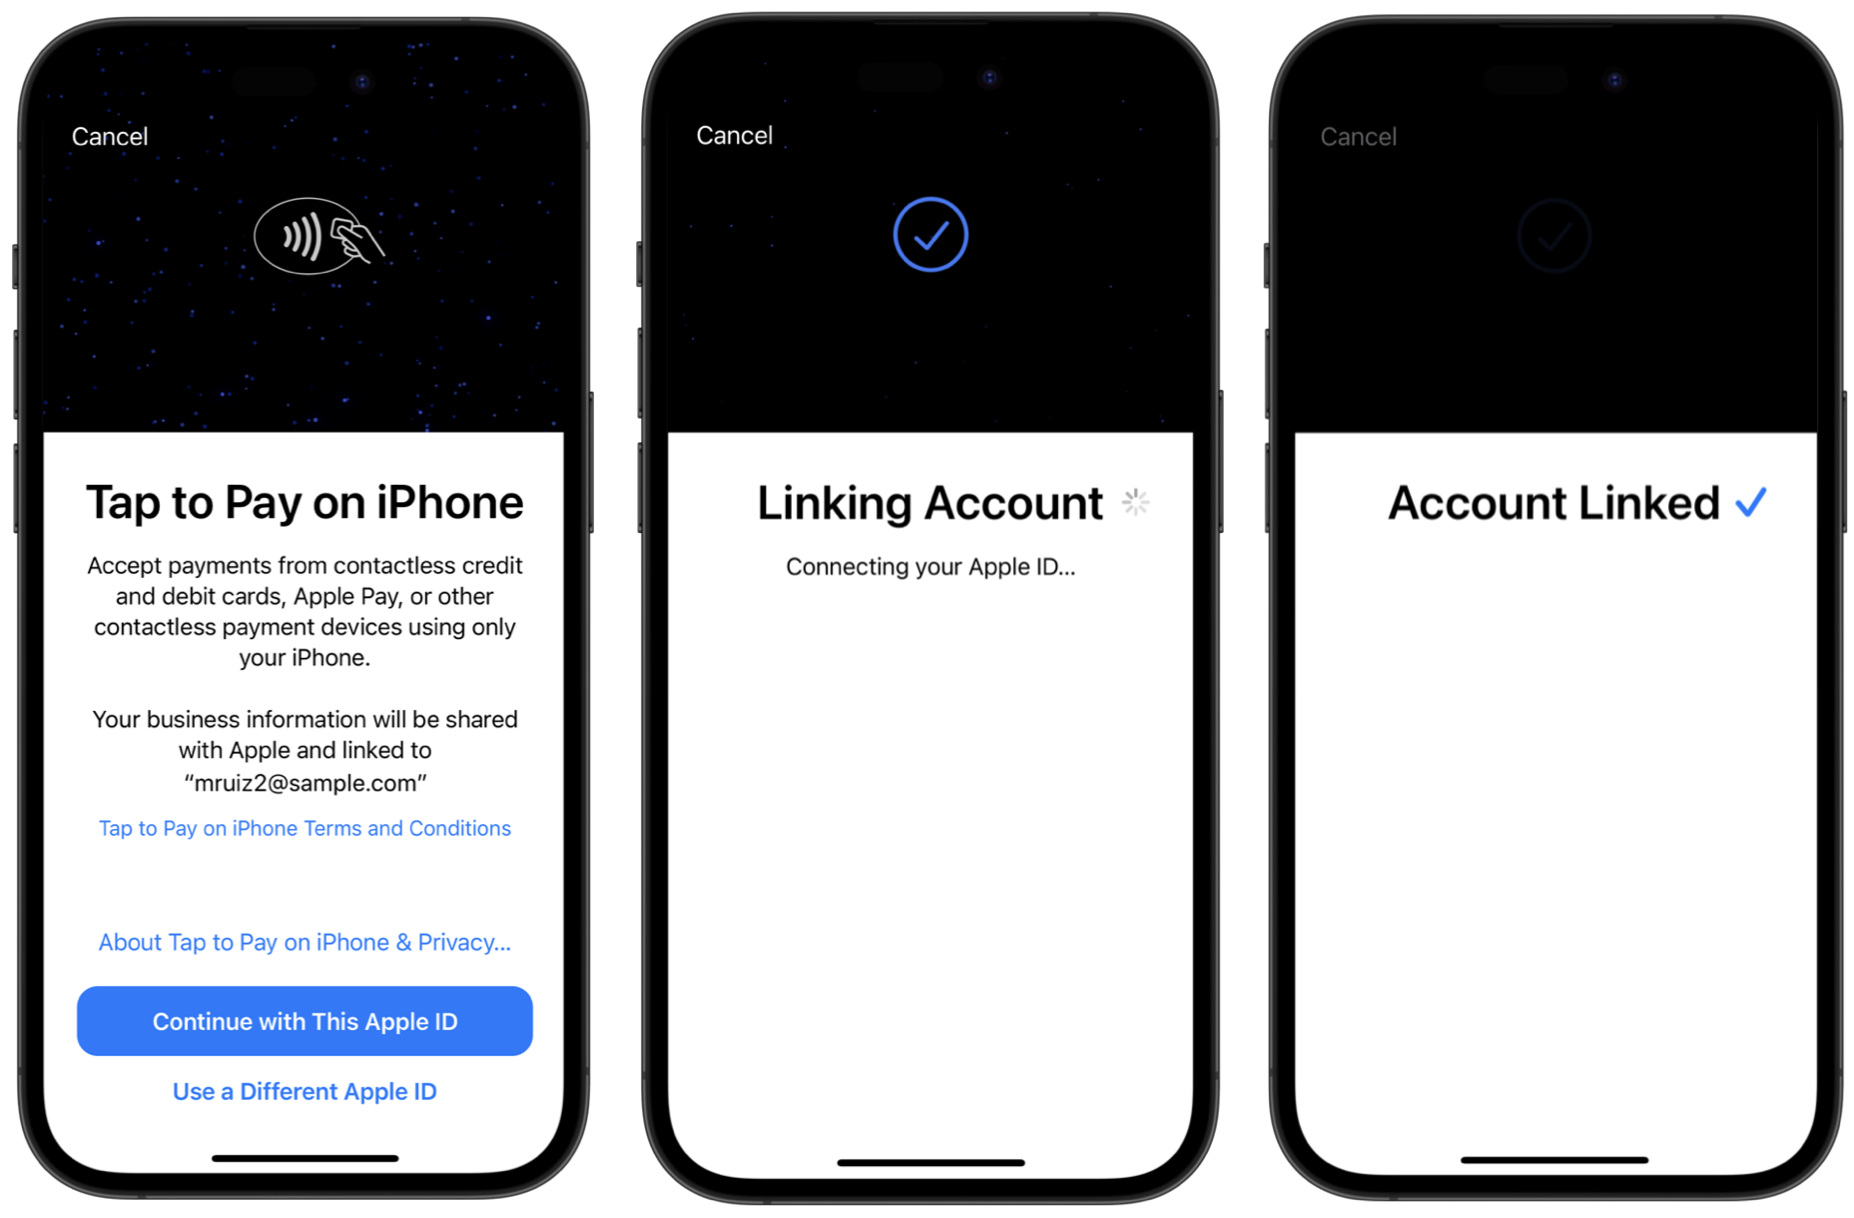
More information about account linking can be found in the Tap to Pay on iPhone Business Information section of the Apple Tap to Pay on iPhone FAQ.
Each iPhone is Limited to Three Merchant IDsAny iPhone will be able to use up to three (3) unique Merchant IDs for each Payment Service Provider (PSP) across apps within a rolling 24-hour period.
Make a Payment with Tap To Pay
Initialize the SDK
Once your app has installed the EverCommerce Payments SDK and the entitlements are properly setup, your app must initialize the SDK.
Configure SDK to Discover Tap To Pay
By default, the EverCommerce Payments SDK is configured to discover only Bluetooth devices. To use Tap To Pay, your app must call the method configureReaderTypes in the SharedECPSdk and include ECPSdkReaderConfigConstants.TapToPay in the NSSet configuredReaderTypes. Once this is configured, your app can proceed to discover and connect to a compatible Tap To Pay device.
Discover and Connect to a Tap To Pay Device
After adding Tap To Pay to the configured readers, your app can call discover devices. Next, if a Tap To Pay Device is found, your app can call connect device to attempt to connect to that device. If your app has configured the SDK to discover both Tap To Pay and Bluetooth, then the call to discover devices may return a list that includes both types of devices. In this case, your app must choose which device to connect to. A Tap To Pay ECPDevice returned from a call to discover devices will always have id_number = "iOS Tap To Pay".
Handle Device Configuration
In addition to accepting Apple's Terms and Conditions, a configuration update may be required and can take up to a few minutes. We recommend connecting to the reader ahead of time in the background to reduce wait time for merchants. Notifications for this process will be sent to your app through the SDK's delegates and events. Specifically, the progress and status of any updates will be sent through the ECPDeviceConfigStatusEvent and ECPDeviceConfigProgressEvent. Make sure your app is set up to handle these events.
Make a Payment with Tap To Pay
With the SDK connected to a Tap To Pay device, your app may proceed to call make sale. Your app will need to collect the necessary information to create the ECPPaymentParameters and pass this into the call to make sale. After make sale is called, the SDK will take control of the device's display and provide the user with instructions to tap their card so that the SDK may collect the payment method details. Once this process completes (or is canceled from payment screen), control of the display will return to your app and the completion handler for make sale will provide information on the success or failure of the payment.
Models
ECPSdkReaderConfigConstants
Constants used to specify which types of devices the SDK will discover.
| Property | Type | Value |
|---|---|---|
| Bluetooth | NSString | "Bluetooth" |
| TapToPay | NSString | "TapToPay" |
Instance Methods
ImportantAs best practice, make sure the completion handler of one operation within the ECPSdk is called prior to attempting to execute an additional operation, to avoid unintended behavior.
Configure Reader Types
Sets the types of devices that will be discovered by the ECPSdk. If this method is not called, the default configuration is set to discover only Bluetooth devices. If the NSSet configureReaderTypes is nil or empty, an error will be returned. Upon successfully configuring the specified reader types, the completion handler will return isReaderTypesConfigured = true and error = nil. Upon failure, the completion handler will return isReaderTypesConfigured = false and an error with additional information.
If Tap To Pay is included as an option to be configured, this method will also check if the device is compatible for Tap To Pay. If the device is not compatible, the completionHander will return with an error indicating that Tap To Pay is not available on that device.
- (void)configureReaderTypes:(NSSet *)configuredReaderTypes completionHandler:(void(^)(BOOL isReaderTypesConfigured, NSSet *configuredReaderTypes, NSError *error))handler| Property | Type | Description |
|---|---|---|
| configuredReaderTypes | NSSet | Required. A set of ECPSdkReaderConfigConstants that specify the types of devices you wish the SDK to attempt to discover. |
| completionHandler | Code Block | Required. Upon execution passes back isReaderTypesConfigured to provide information on the result of configuration. Also passes NSError reference to pass back error information in case of failure. |
Example Implementation:
 NSSet *configuredSet = [NSSet setWithObjects:ECPSdkReaderConfigConstants.Bluetooth, ECPSdkReaderConfigConstants.TapToPay, nil];

[self.sharedECPSdk configureReaderTypes:configuredSet completionHandler:^(BOOL isReaderTypesConfigured, NSSet *configuredReaderTypes, NSError *error) {
                if(isReaderTypesConfigured) {
                    NSLog(@"reader type configured success");

                } else {
                    NSLog(@"configure readers error");
                    NSString *errorMessage = [NSString stringWithFormat:@"failure to configure readers error - %@", error.localizedFailureReason];
                }
            }];
Get Configured Reader Types
Returns an NSSet containing the types of Readers the SDK will attempt to discover.
- (NSSet *)getConfiguredReaderTypesExample Implementation:
NSSet *currentConfiguredReaderTypes = [self.sharedECPSdk getConfiguredReaderTypes];Instance Properties
Display Name
By default, the property displayName is set to nil. If displayName is set to nil or an empty string this will result in the Tap To Pay payment screen displaying the business name associated with the Stripe location. If this value is set to anything other than nil or an empty string, then the value assigned to displayName will show on the payment screen. NOTE: This must be called prior to callingconnect device. Once connected, the display name will be set. To change the display name after connecting, your app must disconnect, set the display name to the desired value, and then reconnect to the Tap To Pay device.
@property (strong, atomic) NSString *displayName;Example Implementation:
NSString *name = @"Farmer's Market";
[self.sharedECPSdk setDisplayName:name];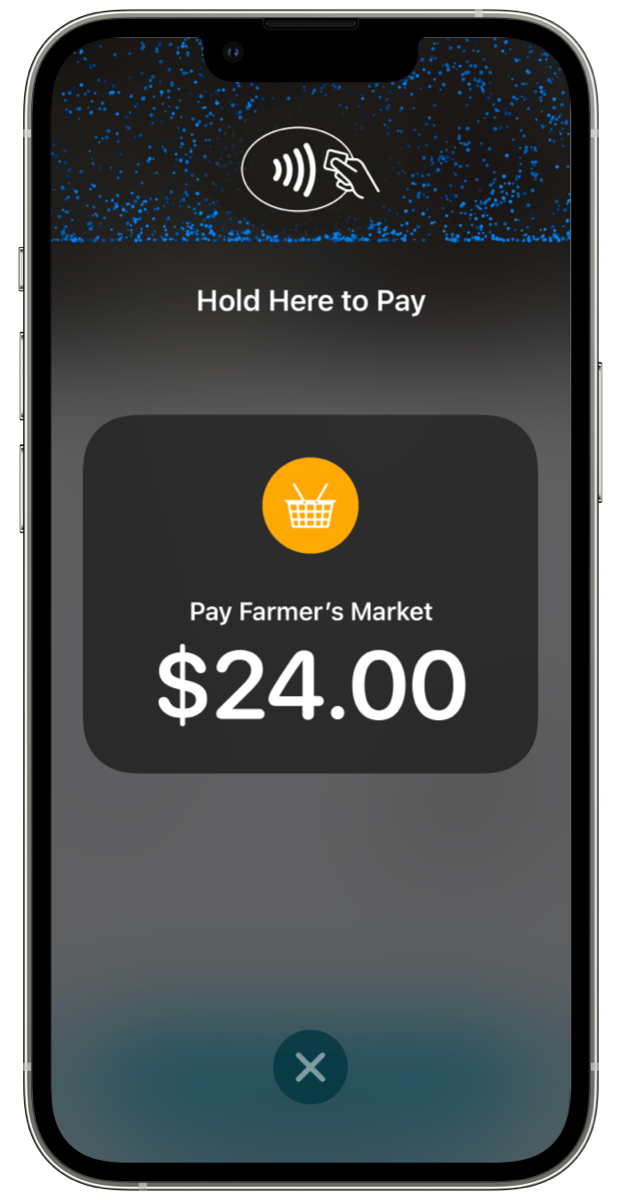
displayName set to "Farmer's Market"
Delegates / Events
Stripe Tap To Pay will use the same delegates and events as a Bluetooth device. The primary difference is that Tap To Pay will take control of the device display and provide the user with instructions to complete the payment. There will be no need for your app to instruct a user to Tap their card.
Updated 9 months ago